Hi,
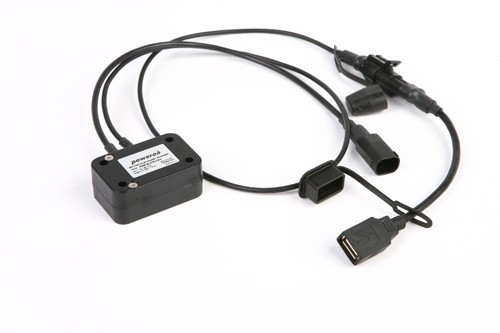
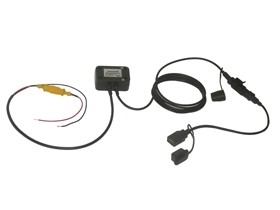
Just ordered one of these
[size=2px]https://www.nippynormans.com/chargers-a ... usb-socket[/size]
[size=2px]
[/size]
[size=2px]Could some please tell me where it plugs into. [/size]
[size=2px]Thanks John [/size]
BMW harness cable
- David.
- Subscriber
- Posts: 8342
- Joined: Fri Nov 07, 2014 7:29 pm
- Location: North Yorkshire
- Bike Model and Year: R1200RT (Camhead) 2012
- Been liked: 395 times

Re: BMW harness cable
This thread is for a 1200, could be the same for the 1250, viewtopic.php?t=9Bellas wrote:Could some please tell me where it plugs into.
- David.
- Subscriber
- Posts: 8342
- Joined: Fri Nov 07, 2014 7:29 pm
- Location: North Yorkshire
- Bike Model and Year: R1200RT (Camhead) 2012
- Been liked: 395 times

Re: BMW harness cable
Looks like the NN wiring harness,

should plug into the upper of these two sockets.


should plug into the upper of these two sockets.
- David.
- Subscriber
- Posts: 8342
- Joined: Fri Nov 07, 2014 7:29 pm
- Location: North Yorkshire
- Bike Model and Year: R1200RT (Camhead) 2012
- Been liked: 395 times

Re: BMW harness cable
Probably the same place as the 1200.Bellas wrote:Great, but where is it exactly on the 1250.
Re: BMW harness cable
Thanks,
I'm new to bmw's and don't know where it is on the 1200.
Sorry for my ignorance.
I'm new to bmw's and don't know where it is on the 1200.
Sorry for my ignorance.
- David.
- Subscriber
- Posts: 8342
- Joined: Fri Nov 07, 2014 7:29 pm
- Location: North Yorkshire
- Bike Model and Year: R1200RT (Camhead) 2012
- Been liked: 395 times

Re: BMW harness cable
These instructions & photos may allow you to access the area required.
First remove the six torx screws shown in the photo. If you prefer, you may leave the two on the instrument cowling and remove them later.

You can now remove the chrome (or black, depending on model) trims to reveal the remaining two screen-retaining screws.

Lift off the screen and put it somewhere safe, then lift off the black plastic screen carrier (shown in photo below).

You can now see the fixings at the front of the instrument cowling. It is held on at the front by two plastic bifurcated rivets with plastic screws.
I found that once the screws were loosened but not removed, as in the photo below, the screw complete with rivet could be easily pulled out.

Once the rivets (and two torx screws mentioned earlier) have been removed the cowling is held in place purely by two studs in rubber grommets.
Pry the cowling up gently from the front of the bike and flip the cowling forward as shown below.

First remove the six torx screws shown in the photo. If you prefer, you may leave the two on the instrument cowling and remove them later.

You can now remove the chrome (or black, depending on model) trims to reveal the remaining two screen-retaining screws.

Lift off the screen and put it somewhere safe, then lift off the black plastic screen carrier (shown in photo below).

You can now see the fixings at the front of the instrument cowling. It is held on at the front by two plastic bifurcated rivets with plastic screws.
I found that once the screws were loosened but not removed, as in the photo below, the screw complete with rivet could be easily pulled out.

Once the rivets (and two torx screws mentioned earlier) have been removed the cowling is held in place purely by two studs in rubber grommets.
Pry the cowling up gently from the front of the bike and flip the cowling forward as shown below.

Last edited by David. on Sun Sep 29, 2019 5:06 pm, edited 1 time in total.
-
beemerboy9
- Posts: 603
- Joined: Sun Jan 31, 2016 9:44 am
- Location: North London
- Bike Model and Year: 1250RT 2019
- Been liked: 21 times

Re: BMW harness cable
David wrote: These instructions & photos may allow you to access the area required.
First remove the six torx screws shown in the photo. If you prefer, you may leave the two on the instrument cowling and remove them later.
You can now remove the chrome (or black, depending on model) trims to reveal the remaining two screen-retaining screws.
Lift off the screen and put it somewhere safe, then lift off the black plastic screen carrier (shown in photo below).
You can now see the fixings at the front of the instrument cowling. It is held on at the front by two plastic bifurcated rivets with plastic screws.
I found that once the screws were loosened but not removed, as in the photo below, the screw complete with rivet could be easily pulled out.
Once the rivets (and two torx screws mentioned earlier) have been removed the cowling is held in place purely by two studs in rubber grommets.
Pry the cowling up gently from the front of the bike and flip the cowling forward as shown below.

David's photos are helpful. You are looking for the power supply to the SatNav to power your new harness instead. So I presume that you are not using a BMW Navigator in the cradle.
John Bentall
Re: BMW harness cable
Yes I am using the satnav, I thought it was an additional cable, apparently not?.
Thanks for the previous post and pics, very helpful.
Thanks for the previous post and pics, very helpful.
- David.
- Subscriber
- Posts: 8342
- Joined: Fri Nov 07, 2014 7:29 pm
- Location: North Yorkshire
- Bike Model and Year: R1200RT (Camhead) 2012
- Been liked: 395 times

Re: BMW harness cable
"If GPS is fitted to your bike then the appropriate socket for this lead will be used and you will need the lead that connected to the battery which is part number - GZM-QLITE-AQ-04"Bellas wrote:Yes I am using the satnav, I thought it was an additional cable, apparently not?.
https://www.nippynormans.com/f650st-f65 ... usb-socket

Last edited by David. on Mon Sep 30, 2019 7:51 am, edited 1 time in total.